

Teaching Guide
Teaching Shoe Tying with the Activity Trainer® Activity App®
The Activity Trainer® Activity App® (ATAA) is designed to help a teacher or parent teach a skill (also called task or activity). The teacher or parent acts as the facilitator that will help the student by providing different types and degrees of prompting and systematic teaching to ensure success. Prompts can be physical, verbal, gestural, or proximity and are applied as degrees or levels. For example, a physical prompt of hand-over-hand helping a student cross his shoe laces would be a high level of prompting, whereas touching or guiding the wrists, forearms, or elbows would be a lower level of physical prompting.

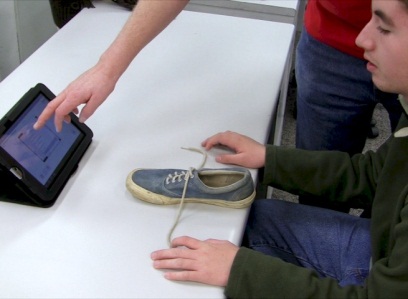
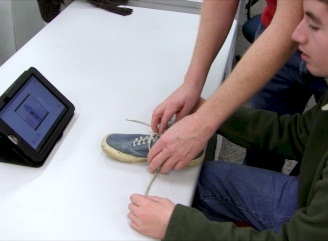
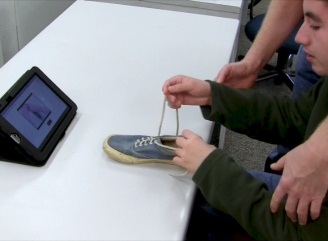
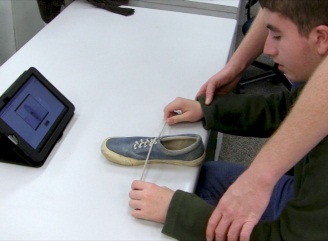
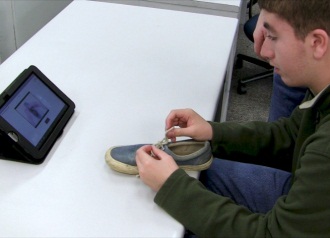
Generally the facilitator will stand behind and to the side of the student. The student will be seated in front of a shoe on a table. The computer tablet (Tablet) should be close to the shoe where the student can easily view both. The facilitator should be able to easily interact with student, shoe, and Tablet.
Range of Learners: The Activity Trainer® (AT) is designed to work with a range of students from average to very low . High level students may be able to learn from the full video whereas lower level or younger students would need to learn the activity step-by-step and then the sequence of steps. Many students can learn from the video and then be able to complete the task without video or other support. Other students may need some coaching in natural environment situations before they are able to do the task appropriately and independently. Some students may need visual supports like images or text to cue them until they can do the task independently.
High level learners: : Just select the “Full video” from the presentation menu and use the Pause and Play buttons to occasionally pause the video to allow the student to catch up and then press Play to continue. You can also just touch the video to play and pause. When at the end of the activity, untie the shoe and get it ready to do the task again, and then touch the Restart button to start the activity over from the beginning. Depending on how well the student is learning and remembering, you may need to practice the activity a number of times per session and a number of sessions over some number of days. The student should be competent tying the shoe on the table top before transitioning to his foot.
Lower level and young learners: Shoe tying is a fairly complex fine motor task, and many young children and special needs individuals have difficulties learning the task. Many students will need the task broken down into steps, learning the parts before learning the complete sequence of the task. There are several teaching strategies all of which are supported by the Activity App®.
- Teaching the parts and then teaching the sequence: Just build the student to independence on each individual step and then practice the steps in sequence.
- Back Chaining: Start the student on the last step, and then the last two steps, and so on until the student is completing the entire task. Make sure the student is able to independently do the number of steps in the current sequence before adding another step to the sequence.
- Forward Chaining: Start the student on the first step, and then the first two steps and so on until the student is completing the full task. Make sure the student is independent on each sequence level before adding another step.
Since shoe tying is a reasonably complex fine motor task, and it is easy for a learner to get discouraged, it can be effective to teach the individual steps first starting with the simpler steps and working to the more difficult steps. It turns out the natural sequence starts fairly simple and gets more difficult, so you can build a sense of success by starting with the first step. It is clear that a successful student is a more engaged and is more inclined to continue the learning process.
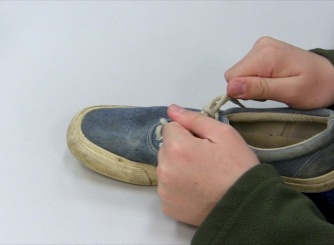
Teaching the individual steps: To Trial (attempted performance of an activity or a segment) a specific step like “Cross the laces over each other”, set the shoe to the initial state of the step. In this case it would be where the laces are laying on the table uncrossed on each side of the shoe.

Have the student’s hands ready but not touching (in this case) the shoe or laces. Select the step from the presentation menu and let it play.

The first time you may not want to facilitate so that you can determine what the student can do independently (Probe Test). Before teaching an activity, do a Probe Test by just watching the student’s performance instead of facilitating success. By first determining what the student can do independently, you can then determine your teaching strategy.
Trials: Each attempted performance of an activity or segment is a Trial. For subsequent Trials after the Probe Test you may need to provide some type of Prompt to ensure the student is successful.
It may take a few to many Trials on a specific step for the student to be independent. For each Trial of the same step, set the shoe and student to the initial state of the step, then either touch the video or the Restart button to start playing the step over.
Prompting: Prompting, from the teacher, is some action or cue to facilitate the success of the student. Prompts can be physical, verbal, gestural, and sometimes proximity. Prompt fading is the process of using successively lower levels of prompts until the prompt is eliminated. Prompting can be applied as most-to-least or least-to-most.
It is important, especially with students who have had little to no success in learning, not to let them fail. Prompting and prompt fading is consistent with errorless teaching techniques. With this technique, the emphasis is on not letting the student fail, but rather build a sense of success and cooperation through fading prompts until the student is independent. Prompts may need to be faded gradually in a number of steps until the student is independent. How fast or slow prompts can be faded is dependent on the student.

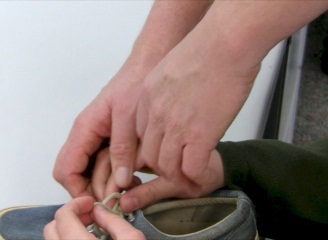
In this case, Physical prompting can be hand-over-hand; or guiding or touching the wrists, the forearms, or the elbows.
Most-to-least with physical prompting is starting with a high level of prompting like hand-over-hand and fading to the least level of the prompt like just touching the elbows and then eliminating all prompting or changing to a gestural, or verbal prompt. Least-to-most prompting would be increasing the prompt until the student is successful. Both techniques can be effective, but different learners may respond better to one or the other. The facilitator may have a preferred method but ultimately should transition to what works or works best for the learner.
The goal for each step is that the student is independent where the teacher is not providing any type or level of prompt. As the student becomes independent on successive steps, it is good to go back and probe, and reteach if necessary previous steps to keep them “maintained”.
Verbal prompting: The Activity App builds the language associated with the task as well as with the individual steps. The facilitator can use this language as verbal prompts to guide the student through the task especially when transitioning to natural environment use of the skill. The goal is to use less and less language until the student is independent.
Gestural prompting can be effective getting the student to perform the task or segment. Here the facilitator would point to something related to the task or make a movement of their hand or other body part that would represent or initiate the action desired.
Proximity prompting is where the student will perform the task as long as the facilitator is present but will not perform the task if the facilitator is not present. To fade the proximity prompt the facilitator may need to incrementally get further away from the student through successive trials until the facilitator does not need to be in the same room or is otherwise out of sight. Facilitation from behind the student minimizes the need for proximity fading since the facilitator is only a small part of the student’s view from the beginning.
Ideally prompting is not necessary. Ideally in video modeling, the student has, or you have developed a “see it – do it” (mimic) response. For initial use by a student of the Activity App, a little verbal encouragement may be sufficient to get the student to understand that there is a need to mimic or follow the video. If the student does not have this mimic behavior, or you are not able to develop the response with just a little coaching, then you should back down to simpler activities or easier parts of an activity. The goal is to use as little prompting as possible. However, you may need to assist the student with fine motor skills or physically intervene with the student where there are safety issues.
Prompt dependence: For lower functioning students and where the facilitator lacks finesse in prompt and prompt fading techniques, the student can become prompt dependent. This is where the student will not perform the task without a prompt from the facilitator. The correction for this problem is to more gradually decrease the prompt, vary the prompt type, and transition to environmental prompts. For students that tend to become prompt dependent, go back and work on simpler tasks to build a strong mimic response to minimize the need for the facilitator to prompt on harder tasks.
An environmental prompt is a situation that cues the student to perform a task. An example is if the student wants or needs to go outside, and he currently has his shoes off, the situation would prompt the student to put on and tie his shoes to go outside. For many skills including shoe tying, the situational prompt is our ultimate goal.
Visual prompt: Where a student needs a continued visual cue to perform the task, then an image of the task or the written instruction may be used to invoke the skill. An image or text instruction by the door may remind the student to put on his shoes. Images can also be worked into visual schedules and text can be used in a socially acceptable cuing system a “to-do list“.
Reinforcements: Provide reinforcements (praise, tickles, favorite toys, small edibles,) at appropriate intervals and at the end of the session to keep the student motivated for the hard work. The important thing about reinforcements is that the student finds them reinforcing.
Sequences: Once the student can do the individual steps or if teaching as a back chain or forward chain, then select a sequence from the presentation menu. The first step of the sequence will start playing. Once finished playing and the student is finished with the step, touch the page turner (bottom right corner) to advance to the next step. Repeat until the last step of the sequence. Reinforce the student and either start again or end the session. You can start a step again by touching the Restart Button, or start the sequence over by selecting it from the presentation menu.
If you are back-chaining, just select the last step in the steps submenu from the sequence in the presentation menu. If you are forward-chaining just restart the sequence by selecting it from the presentation when at the last desired step in the forward-chain or select the done button to exit.
Full Video: Once the student can perform the sequence, then you can select the “Full video” and let the student perform the complete task. You may need to use the pause and play capabilities if the student has a hard time keeping up. The student does not necessarily need to keep up if there is evidence that the student is remembering what to do to complete the task.
Video to Image Transition: : If the student needs continued visual support to cue the task or you want to use the task in a visual schedule, then select the video to image transition once the student can do the task. You can then follow up with just the image and audio and then just the image to cue the skill. You can print off the representative image for cueing and schedules, or print off the sequence of images corresponding to the steps for sequencing tasks (getting the student to put the images in order). Print the image(s) from our website support page AES Activity App: Shoe Tie 1.
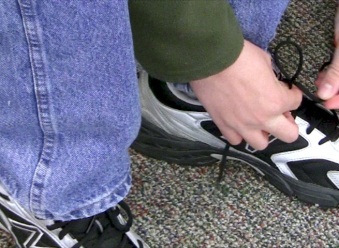
Transitioning to his foot: Once the student can independently tie a shoe on top of the table, then transition the skill to the foot. Through the process of learning the steps, the student should have the language associated with the various aspects of shoe tying. First, tell the student to tie his/her shoe and see if he/she is able to do this independently. You may need to verbally prompt “Cross the laces” to get him/her started or touch his/her elbows or do hand over hand to give him/her the idea that he/she can do the skill too. You may have to go back through the steps and then sequences until he/she is independent. In many cases with a little coaching, the student can “generalize” the skill to his/her foot. You may also need to generalize to other people telling him/her to put on or tie his/her shoes, to other shoes, to other places, or to realizing on his/her own that he/she needs his/her shoes on and tied before he/she can go outside (or some other favorite activity).
Building independence: The ultimate goal of teaching a skill is not only that the student learns how to do the skill, but also is able self-initiate the skill in appropriate situations without direction from the teacher or parent. For lower functioning or young students, you may need to initially contrive situations where the student is highly motivated to get the student to self-initiate the behavior. Higher level students generally transition to self-initiated behavior fairly easily where they are interested and motivated. With lower functioning students, younger students, or for non-desired skills, the facilitator may have significant work to do to fade support and build motivation.
Reading comprehension: For students that can decode (saying written words) but not comprehend, you can facilitate reading comprehension with the IA, ITA, TA, and T options in the menu. The audio is the instructional or self-talk language corresponding to the step or task. The text corresponds to the audio. Start with the IA (image & audio) to cue, and then transition to the ITA (image, text, and audio). Repeat trials immediately and also after being away from the task for a while. When transitioning to a new level, trial the level immediately after trialing the previous level. Next, present the TA (text and audio), and finally just the T (text) where he has to read and comprehend to complete the task. You will need to use different activities cuing the student with just text to verify comprehension.
To print or view more information on this activity, visit www.dttrainer.com/activity-app/teaching-guide.
© 2012 Accelerations Educational Software – Duplicate freely with full credits
